This tutorial is part of the Marmalade SDK tutorials collection. To see the tutorials index click here
In our previous tutorial we created an extensible animation system that allowed us to create discrete frame based image animation as well as other types of animations. This week we will continue on our quest to create an easy to use, extensible cross platform 2D game engine. In order to do this effectively we need to get organised and organised we will be. If you just want the code to this tutorial then download it from here.
Ok, so how do we organise things in a 2D engine? What sort of things do we want our 2D engine to do? Here’s a brief list:
- We want sprites and animations obviously, these we already covered in previous tutorials
- We want sprite creation / handling to be automated so that we do not have to worry about creating, updating and destroying sprites
- We want to define specific types of game objects (players, bombs, aliens, pickups etc..) modelled on a single game object type
- We want scenes that contain our game objects, managing their life times and updates
- We want cameras that we can move around in our scene to view different parts of the scene.
- We want our game objects to recognise when they collide with each other and react to each other
To manage all of the above we are going to create a Camera, Actor, Scene (CAS) system.
Cameras, Actors and Scenes
The camera, actor and scene system (CAS) constitutes the logical implementation of our game engine. The scene represents our finite gaming world, whilst actors represent our individual game objects that live within our gaming world. The scene manages all of our actors for us, taking care of updating them and deleting them when they are no longer needed. The camera represents a view into the gaming world that can be moved around, rotated and scaled to view different parts of the world.
CIwGameActor – Our game objects are really just actors on a stage
Ok, we will begin by taking a look at the CIwGameActor class:
class CIwGameActor
{
protected:
    // Properties
    CIwGameScene*       Scene;                   // Scene that actor lives in
    bool                Used;                    // Used is used when actors pooled to reduce memory fragmentation
    bool                Managed;                 // Marks this actor as being managed by another object so we do not delete it
    unsigned int        NameHash;                // Name of Actor (stored as an hash for speed)
    int                 Type;                    // Type of Actor (use to distinguish beteeen different actor types)
    CIwFVec2            OriginalPosition;        // Original position of actor in the scene (when actor was first spawned)
    CIwFVec2            Position;                // Current position of actor in the scene
    CIwFVec2            Velocity;                // Current velocity of actor
    CIwFVec2            VelocityDamping;         // Dampens the velocity
    float               OriginalAngle;           // Original angle in scene (when first spawned)
    float               Angle;                   // Orientation in scene (degrees)
    float               AngularVelocity;         // Angular velocity
    float               AngularVelocityDamping;  // Angular velocity damping
    float               Scale;                   // Scale
    CIwColour           Colour;                  // Colour
    bool                IsActive;                // Active state of actor
    bool                IsVisible;               // Visible state of actor
    bool                IsCollidable;            // Collidable state of actor
    CIwGameSprite*      Visual;                  // Visual element that represents the actor
    CIwGameAnimManager* VisualAnimManager;       // Visuals animation manager, used to control the actors visual componen animations
    int                 CollisionSize;           // Size of collision area
    CIwRect             CollisionRect;           // Spherical collision size
    float               PreviousAngle;           // Previous updates angle
    CIwFVec2            PreviousPosition;        // Previous updates position
public:
    void                setUsed(bool in_use)                     { Used = in_use; }
    bool                isUsed() const                           { return Used; }
    void                setManaged(bool managed)                 { Managed = managed; }
    bool                isManaged() const                        { return Managed; }
    void                setScene(CIwGameScene* scene)            { Scene = scene; }
    CIwGameScene*       getScene()                               { return Scene; }
    void                setName(const char* name)                { NameHash = IwHashString(name); }
    unsigned int        getNameHash()                            { return NameHash; }
    void                setType(int type)                        { Type = type; }
    int                 getType() const                          { return Type; }
    void                setOriginalPosition(float x, float y)    { OriginalPosition.x = x; OriginalPosition.y = y; }
    CIwFVec2            getOriginalPosition()                    { return OriginalPosition; }
    void                setPosition(float x, float y)            { Position.x = x; Position.y = y; }
    CIwFVec2            getPosition()                            { return Position; }
    void                setOriginalAngle(float angle)            { OriginalAngle = angle; }
    float               getOriginalAngle()                       { return OriginalAngle; }
    void                setAngle(float angle)                    { Angle = angle; }
    float               getAngle()                               { return Angle; }
    void                setVelocity(float x, float y)            { Velocity.x = x;  Velocity.y = y; }
    CIwFVec2            getVelocity()                            { return Velocity; }
    void                setVelocityDamping(float x, float y)     { VelocityDamping.x = x;  VelocityDamping.y = y; }
    void                setAngularVelocity(float velocity)       { AngularVelocity = velocity; }
    float               getAngularVelocity() const               { return AngularVelocity; }
    void                setAngularVelocityDamping(float damping) { AngularVelocityDamping = damping; }
    void                setScale(float scale)                    { Scale = scale; }
    float               getScale() const                         { return Scale; }
    void                setColour(CIwColour& colour)             { Colour = colour; }
    CIwColour           getColour() const                        { return Colour; }
    void                setActive(bool active)                   { IsActive = active; }
    bool                isActive() const                         { return IsActive; }
    void                setVisible(bool visible)                 { IsVisible = visible; }
    bool                isVisible() const                        { return IsVisible; }
    void                setCollidable(bool collidable)           { IsCollidable = collidable; }
    bool                isCollidable() const                     { return IsCollidable; }
    void                getVisual(CIwGameSprite* visual)         { Visual = visual; }
    CIwGameSprite*      getVisual()                              { return Visual; }
    void                setVisualAnimManager(CIwGameAnimManager* anim_manager) { VisualAnimManager = anim_manager; }
    CIwGameAnimManager* getVisualAnimManager()                   { return VisualAnimManager; }
    void                setCollisionRect(CIwRect& rect);
    CIwRect             getCollisionRect() const                 { return CollisionRect; }
    int                 getCollisionSize() const                 { return CollisionSize; }
    void                setPreviousPosition(float x, float y)    { PreviousPosition.x = x; PreviousPosition.y = y; }
    CIwFVec2            getPreviousPosition() const              { return PreviousPosition; }
    void                setPreviousAngle(float angle)            { PreviousAngle = angle; }
    float               getPreviousAngle() const                 { return PreviousAngle; }
    // Properties end

    CIwGameActor() : Used(false), Managed(false), Scene(NULL)    { Reset();  }
    virtual            ~CIwGameActor();

    // Reset the actor (used by memory pooling systems to save actor re-allocation, usually called after re-allocation to reset the object to a default state)
    virtual void    Reset();

    // Update the actor (called by the scene every frame)
    virtual bool    Update(float dt);

    // Update the visual that represents this actor on screen
    virtual bool    UpdateVisual();

    // Actors are responsible for carrying out there own collision checks. Called after all actor updates to check and resolve any collisions
    virtual void    ResolveCollisions() = 0;

    // NotifyCollision is called by another actor when it collides with this actor
    virtual void    NotifyCollision(CIwGameActor* other) = 0;

    // Call to see if this actor was tapped by the user
    virtual bool    CheckIfTapped();

    // Checks to see if another actor is colliding with this actor
    bool            CheckCollision(CIwGameActor* other);
};
Hmm, I agree, its a bit on the BIG side, but if you look carefully our CIwGameActor class provides a lot of functionality built in, which in the long run will save us lots of coding time. Again, you never create a direct instance of this class as it is abstract, you dervice your own different actor types from CIwGameActor.
We handle a lot of functionality with this base class including:
- Position, orientation, scale, angular velocity, velocity damping and angular velocity damping – Physical attributes of our actor
- Visibility state, active state, collide-able state – Used to hide, disable and mark as collide-able objects
- Object type identifier, object name (used to search for specific types of objects or named objects). These are very useful as they allow you to create actors and forget about them, no need to store a pointer to them to reference them later, you simply ask the scene to find the object by name or type to access it again.
- Visual, colour and animation manager – We will use these variables to give our object a visual representation in our world
- Collision size and collision rectangle are used for collision detection
Note that eventually we will be replacing the physical components in this class with the Box2D physics engine.
I would like to point out a few important methods in this class:
- Update() – When you implement your own actor types you override this method to provide the implementation of your game object specific behaviour. For example, if you create a player actor then you may check and move the player, maybe fire of different animations / sound effects. The default implementation of Update() will update the basic physics for the actor, any attached playing animations as well as add the actor to the collision check list if it is collision enabled. You should call CIwGameActor::Update() in your own Update() implementation, if you want to keep this functionality.
- UpdateVisual() – You do not generally need to override and provide your own implementation of this method as this method will automatically update the actors associated visual for you.
- ResolveCollisions() – When the scene has finished calling all of its actor updates it will then call ResolveCollisions() on each of the actors. You provide the implementation of this method to check for collisions with other actors. We implement collision checking this way as it allows us to optimise which collision checks to make. For example, lets say we are creating the old game Asteroids. The scene consists of 10 asteroids, 10 bullets and our ship. Our ship actor only needs to check for collisions with the asteroids and not the bullets or the ship.
- NotifyCollision() – When an actor collides with another actor we need some mechanism for letting the other actor know that we have collided with them. When an actor collides with this actor it will call its NotifyCollision() method to let it know, this gives the actor a chance to respond to the collision event
- CheckIfTapped() – Whilst this method is not currently implemented it will eventually allow us to check and see if the actor was tapped by the user. This is good for allowing the user to interact with our actors
- CheckCollision() – Helper method for checking if two actors bounding circles overlap
One important note about Actors is there coordinate system. As far as our scene is concerned, the worlds centre is the the middle of the scene (0, 0), which corresponds to the centre of the screen for a scene that has not been moved.
CIwGameActorImage – An image based actor helper class
I suspect that many of you will want to simply get up and running quickly with your game and not have to worry about deriving your own actor class. With that in mind I created an image based actor that allows you to quickly set up a basic image based actor, complete with a sprite atlas, a base animation and a size. Lets take a quick look at the code in that class as I thin it will prove helpful when it comes to you designing your own actors:
bool CIwGameActorImage::Init(CIwGameScene* scene, CIw2DImage* image, CIwGameAnimImage* anim, int width, int height)
{
    // Reset the actor
    CIwGameActor::Reset();

    // Set the scene
    Scene = scene;

    // Create sprite
    if (image != NULL)
    {
        CIwGameBitmapSprite* sprite = new CIwGameBitmapSprite();
        if (sprite == NULL)
            return false;

        // Set sprite image
        sprite->setImage(image);
        sprite->setDestSize(width, height);

        // Set sprite as visual
        Visual = sprite;

        // Add sprite to the sprite manager so it can be managed and drawn
        Scene->getSpriteManager()->addSprite(sprite);
    }

    // Create an animation manager and add the animation to it
    if (anim != NULL)
    {
        VisualAnimManager = new CIwGameAnimManager();
        VisualAnimManager->setUpdateAll(false);
        if (VisualAnimManager == NULL)
            return false;
        VisualAnimManager->addAnimation(anim);

        // Set the first animation in the animation manager as the current animation
        VisualAnimManager->setCurrentAnimation(0);
    }

    return true;
}
Our Init() method is pretty simple, it resets the actors internal data to default, creates a bitmapped sprite visual from the image and actor size then creates an animation manager and adds our default animation to it.
bool CIwGameActorImage::UpdateVisual()
{
    if (CIwGameActor::UpdateVisual())
    {
        // Update the sprite
        if (VisualAnimManager != NULL)
        {
            // Get the animations current image frame data and copy it to the bitmapped sprite
            CIwGameAnimImage* anim = (CIwGameAnimImage*)VisualAnimManager->getAnimation(0);
            if (Visual != NULL)
                ((CIwGameBitmapSprite*)Visual)->setSrcRect(anim->getCurrentFrameData());
        }

        return true;
    }

    return false;
}
Our UpdateVisual() method simply moves the image animation frame data to our sprite to update its image.
Unfortunately you will still need to derive your own actor from CIwGameActorImage() in order to create an actor object
CIwGameScene – A place for actors to play
The scene is the place where we put actors. When you add an actor to a scene the scene will take care of calling game logic update and visual update methods and building a list of potential colliding actors, as well as cleaning up the actors when the game is finished.
The scene also takes care of updating the camera and fitting our game across different sized screens with different aspect ratios. Look as the scene as the driving force that manages much of our game processes for us, so we can get on with coding up cool actors and other game logic.Lets take a quick look at the CIwGameScene class:
class CIwGameScene
{
public:
    // Public access to actor iteration
    typedef CIwList::iterator _Iterator;
    _Iterator                begin() { return Actors.begin(); }
    _Iterator                end() { return Actors.end(); }

    // Properties
protected:
    CIwGameSpriteManager*    SpriteManager;        // Manages sprites for the whole scene
    CIwGameAnimFrameManager* AnimFrameManager;     // Manages the allocation and clean up of animation frames
    unsigned int             NameHash;             // Hashed name of this scene
    CIwVec2                  ScreenSize;           // Native screen size
    CIwVec2                  VirtualSize;          // The virtual size is not the actual size of the scene. but a static pretend size that we can use to render to without having to cater for different sized displays
    CIwMat2D                 VirtualTransform;     // Virtual transform is used to scale, translate and rotate scene to fit different display sizes and orientations
    CIwMat2D                 Transform;            // Scene transform
    CIwList                  Actors;               // Collection of scene actors
    CIwRect                  Extents;              // Extents of scenes world
    CIwGameCamera*           Camera;               // Current camera
    CIwGameActor**           Collidables;          // List of collidable objects built this frame
    int                      MaxCollidables;       // Maximum allowed collidables
    int                      NextFreeCollidable;   // Points to next free slot in sollidables list pool
public:
    CIwGameSpriteManager*    getSpriteManager()                       { return SpriteManager; }        // Manages sprites for the whole scene
    CIwGameAnimFrameManager* getAnimFrameManager()                    { return AnimFrameManager; }     // Manages the creation and clean up of animation frames
    void                     setName(const char* name)                { NameHash = IwHashString(name); }
    unsigned int             getNameHash()                            { return NameHash; }
    CIwVec2                  getScreenSize() const                    { return ScreenSize; }
    CIwVec2                  getVirtualSize() const                   { return VirtualSize; }
    void                     setVirtualTransform(int required_width, int required_height, float angle, bool fix_aspect = false, bool lock_width = false);
    CIwMat2D&                getVirtualTransform()                    { return VirtualTransform; }
    CIwMat2D&                getTransform()                           { return Transform; }
    void                     addActor(CIwGameActor *actor);
    void                     removeActor(CIwGameActor* actor);
    void                     removeActor(unsigned int name_hash);
    CIwGameActor*            findActor(unsigned int name_hash);
    CIwGameActor*            findActor(int type);
    void                     clearActors();
    void                     setExtents(int x, int y, int w, int h)   { Extents.x = x; Extents.y = y; Extents.w = w; Extents.h = h; }
    CIwRect                  getExtents() const                       { return Extents; }
    void                     setCamera(CIwGameCamera* camera)         { Camera = camera; }
    CIwGameCamera*           getCamera()                              { return Camera; }
    bool                     addCollideable(CIwGameActor* actor);
    CIwGameActor**           getCollidables()                         { return Collidables; }
    int                      getTotalCollidables() const              { return NextFreeCollidable; }
    // Properties end
private:
public:
    CIwGameScene() : Collidables(NULL), SpriteManager(NULL), AnimFrameManager(NULL), NextFreeCollidable(0), Camera(NULL), MaxCollidables(0) {}
    virtual ~CIwGameScene();

    // After creating the scene, call Init() to initialise it, passing the maximum number of actors that you expect can collide
    virtual int        Init(int max_collidables = 128);

    // Update() will update the scene and all of its contained actors
    virtual void       Update(float dt);

    // Draw() will draw all of the scenes actors
    virtual void       Draw();

    // Event handlers
};
Yep, I know, its another biggy, but again it supports lots of cool functionality such as:
- Handles all of our actors
- Handles our camera
- Fits our game to any sized screen / any aspect ratio using a virtual size display
- Tracks potential colliders
- Manages sprites and animation frames
You will be happy to know that you do not need to derive you own scene from CIwGameScene() and you will generally instantiate and work with a version of this class directly. Our scene class does not however need a little setting up initially. Heres asome basic code on how to set up a scene:
CIwGameScene* game_scene = new CIwGameScene();
game_scene->Init();
game_scene->setVirtualTransform(VIRTUAL_SCREEN_WIDTH, VIRTUAL_SCREEN_HEIGHT, 0, true, false);
I think at this point I need to explain something about the virtual screen system that I use to ease the pain of cross platform development
Using a Virtual Screen Size to Target Any Sized Screen
There are quite a few different solutions knocking around that solve the problem of targeting our game at a variety of different screen resolutions, including:
- Scale to fit – This is a very simple scaling of the scene to match the display resolution. This is quick and simple but your game can appear stretched or squashed on displays that have a different aspect ratio to your game aspect ratio
- Bordered – Another simple system that displays your game at its native resolution but with a border around it to fill the space that your game doesn’t cover. I don’t like this method as you are giving up too much screen real-estate
- Unlimited screen size – This method is quite complex and involves rendering enough stuff on screen at a 1:1 pixel resolution to cover the entire screen. This disadvantage (and advantage, depends how much time you have on your hands) of using this method is that you would need to display a much larger area of the gaming world on a higher resolution display than on a lower resolution display.
- Virtual screen – This method uses a pretend screen size that best fits many resolutions (800 x 512 / 512 x 800 is a good choice). Your game renders everything as though it is rendering to the virtual size and not the actual phones / tablets native screen size. You later scale and translate the virtual canvas to fit onto the native phones screen resolution.
We could use any of these methods in our game, but I am going to use a virtual canvas because it is the most convenient. Our CIwGameScene class has a method called setVirtualTransform() which will set this up for us, so that all of our actors will render to the virtual screen size. Heres how to use the method:
void CIwGameScene::setVirtualTransform(int required_width, int required_height, float angle, bool fix_aspect, bool lock_width)
- required_width, required_height – This is the width and height we would like to use for our virtual screen
- fix_aspect – Tells the scene to fix the aspect ratio of the scene to match the native screen aspect ratio
- lock_width – Tells the scene to fix eth aspect ratio based on the width of the display instead of the height
CIwGameCamera – Our View Into the Gaming World
Many games can get away with simply one visible screen of information (such as Asteroids, Space Invaders, Pac-man etc..), but other types of games such as platformers, sports games, strategy games etc.. require the ability to move around the gaming world in some fashion. This is usually accomplished by using a camera that can move our point of view within the world. CIwGameScene supports the attachment of a camera to allow us to move our view around a larger virtual world. Lets take a quick look at the CIwGameCamera class:
class CIwGameCamera
{
public:
    // Properties
protected:
    unsigned int            NameHash;         // Hashed name of this camera
    CIwMat2D                Transform;        // The combined camera transform
    CIwFVec2                Position;         // Position of view within scene
    float                   Scale;            // Cameras scale
    float                   Angle;            // Cameras angle
    bool                    TransformDirty;   // Marks camera transform needs rebuilding
public:
    void                    setName(const char* name)            { NameHash = IwHashString(name); }
    unsigned int            getNameHash()                        { return NameHash; }
    CIwMat2D&               getTransform()                       { return Transform; }
    void                    setPosition(float x, float y)        { Position.x = x; Position.y = y; TransformDirty = true; }
    CIwFVec2                getPosition() const                  { return Position; }
    void                    setScale(float scale)                { Scale = scale; TransformDirty = true; }
    float                   getScale() const                     { return Scale; }
    void                    setAngle(float angle)                { Angle = angle; TransformDirty = true; }
    float                   getAngle() const                     { return Angle; }
    void                    forceTransformDirty()                { TransformDirty = true; }
    bool                    isTransformDirty() const             { return TransformDirty; }
    // Properties end

private:

public:
    CIwGameCamera() : Position(0, 0), Scale(1.0f), Angle(0), TransformDirty(true) {}
    virtual ~CIwGameCamera()    {}

    // Updates the camera
    virtual void    Update();

    // Event handlers
};
Ah much better, nice and short. As you can see the camera class is quite simple, supporting position, rotation and scaling of the view. To use a camera we simply create one and attach it to the Scene, the scene will then follow the camera around. To see different areas of the game world we simply move the camera around and all of our actors will move along with it.
Cool, I’m now done with explaining the new classes. I’ve been battling with trying to keep this article short and to the point, but alas I don’t think its quite happening for me.
What’s changed in IwGame Code
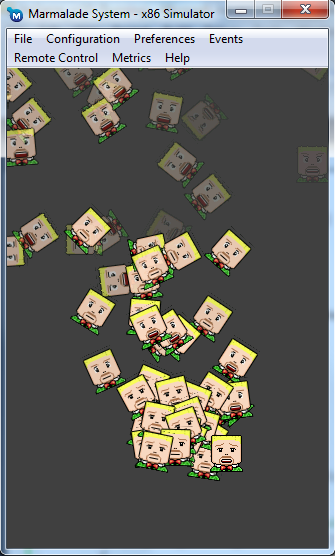
I will be honest, A LOT has changed since the previous article and I will try my best to walk through most of it; this is the main problem with an engine that’s in-development.
Firstly I have had to make quite a few changes to our previous classes including:
- CIwGameAnim – CIwGameAnimFrameManager now handles the life time of animation frames and not the separate animation classes themselves
- CIwGameAnimFrameManager – Added the ability to retrieve allocated animation frames
- CIwGameAnimManager – setCurrentAnimation() never actually set the current animation (oops, fixed)
- CIwGameBitmapSprite – Source rectangle can now be set from a CIwGameAnimImageFrame (helper method just saves some typing)
- CInput – This class has been renamed to CIwGameInput to fit in with the frameworks naming conventions. CIwGameInput is now a singleton and not declared as a global variable (I’m not generally a fan of global variables and prefer to use singletons for systems that there will only ever be one instance of). If you do not know what a singleton is then think of it as a global instance of a class.
Now onto the changes to Main.cpp. Note that I won’t be going into minor details such as “Oh I included these header files”.
We now accesss input using a singleton, here we have to create the IwGameInput singleton and then initialise it:
// Initialise the input system
CIwGameInput::Create();
IW_GAME_INPUT->Init();
Note that IW_GAME_INPUT is just a macro that calls CIwGameInput::getInstance() (I find it more readable to use the macro)
Next, we create and initialise a scene then create a camera and attach that to the scene
// Create a scene
CIwGameScene* game_scene = new CIwGameScene();
game_scene->Init();
game_scene->setVirtualTransform(VIRTUAL_SCREEN_WIDTH, VIRTUAL_SCREEN_HEIGHT, 0, true, false);

// Create a camera and attach it to the scene
CIwGameCamera* game_camera = new CIwGameCamera();
game_scene->setCamera(game_camera);
Next, we allocate a bunch of image animation frames for our manic face animation. Take note that we now allocate them through the game scenes animation manager. This ensures that the game scene later cleans them up for us.
// Allocate animation frames for our player
CIwGameAnimImageFrame* anim_frames = game_scene->getAnimFrameManager()->allocImageFrames(8, 36, 40, 0, 0, 512, 40, 512);
Within our main loop we check for the player tapping the screen and if they do we explode 10 sprites into the scene at the tapped position:
if (IW_GAME_INPUT->getTouchCount() > 0)
{
    if (!PrevTouched)
    {
        // Get tapped position in our virtual screen space
        CIwFVec2 pos = game_scene->ScreenToVirtual(IW_GAME_INPUT->getTouch(0)->x, IW_GAME_INPUT->getTouch(0)->y);

        // Create 10 player actors
        for (int t = 0; t < 10; t++)
        {
            // Create and set up our face animation
            CIwGameAnimImage* face_anim = new CIwGameAnimImage();
            face_anim->setFrameData(anim_frames, 8);
            face_anim->setLooped(-1);
            face_anim->setPlaybackSpeed(0.2f);
            face_anim->Start();

            // Create player actor
            ActorPlayer* player = new ActorPlayer();
            player->Init(game_scene, sprites_image, face_anim, 36, 40);
            player->setName("Player");
            player->setPosition(pos.x, pos.y);

            // Add player actor to the scene
            game_scene->addActor(player);
        }
    }
    PrevTouched = true;
}
else
    PrevTouched = false;
Note that because we are now dealing with a virtual screen resolution and not the actual native screen resolution, our tap coordinates need converting to virtual screen coordinates. We achieve that using the ScreenToVirtual() method of the CIwGameScene class.
Also note that we still have to create our face_anim animation, but this time we pass it to the ActorPlayer Init() method, so that the actor / scene can take of its management.
Next we update and draw the scene:
// Update the scene
game_scene->Update(1.0f);

// Draw the scene
game_scene->Draw();
Lastly we clean-up the camera, scene and input system:
// Safely clean up the camera
if (game_camera != NULL)
    delete game_camera;

// Safely cleanup game scene
if (game_scene != NULL)
    delete game_scene;

// Shut down the input system
IW_GAME_INPUT->Release();
CIwGameInput::Destroy();
ActorPlayer our First Derived Actor
ActorPlayer is our very first user defined CIwGameActor based actor and because we derived it from CIwGameActorImage (and in turn CIwGameActor) we get all of the useful functionality defined in those classes.
The only parts of our ActorPlayer that’s worth drawing out are the Init() and Update() methods:
bool ActorPlayer::Init(CIwGameScene* scene, CIw2DImage* image, CIwGameAnimImage* anim, int width, int height)
{
    CIwGameActorImage::Init(scene, image, anim, width, height);

    FadeTimer.setDuration(1000);
    Velocity.x = IwRandMinMax(-100, 100) / 20.0f;
    Velocity.y = IwRandMinMax(-100, 100) / 20.0f;
    AngularVelocity = IwRandMinMax(-100, 100) / 20.0f;

    return true;
}
Our Init() method calls the base CIwGameActorImage::Init() method to initialise the base CIwGameActorImage part of the actor. We then set up a fade timer and random velocities for position and spin.
bool ActorPlayer::Update(float dt)
{
    // If fade timer has timed out then delete this actor
    if (FadeTimer.HasTimedOut())
    {
        return false;    // Returning false tells the scene that we need to be removed from the scene
    }

    // Calculate our opacity from time left on fade timer
    int opacity = FadeTimer.GetTimeLeft() / 2;
    if (opacity > 255) opacity = 255;
    Colour.a = opacity;

    return CIwGameActorImage::Update(dt);
}
Our Update() method is called every game loop by the scene system, so keep in mind that this code will be called every single game frame. Firstly we check to see if the fade timer has timed out and if it has then we return false to the the scene system (this causes the actor to be removed from the scene / game) after the scene has finished updating all actors.
We then calculate the opacity of our actor from the time left on the fade timer which causes the actor to fade out of existence.
And that’s about it for this article, hope that most of your managed to stay awake, long drawn out technical stuff can send the best of us to sleep, especially if read on a few hours sleep, which is usually the case for us programmer types. The source code that accompanies this article can be downloaded from here
I’m quite happy with this blog as it marks the start of a real usable cross platform game engine that we can now build upon. In our next tutorial we are going to cover upgrading the engine to include some very basic collision detection and response whilst building a small game using the engine to show working collision. We will also cover handling frame rate variations and putting some audio in there. Hopefully I will get the time to do that this weekend.
That’s it for now and don’t forget HTML 5 is evil! (Just kidding, I got a book on it the other day and it looks quite good, think that I may use it to spruce up my blog)