Funky Cam 3D Top Downloaded App for Bada on Samsung Apps


Funky Cam 3D Icon
Funky Cam 3D Icon

Yes, you read that right, we are pretty excited to announce that our Marmalade powered Samsung Bada app Funky Cam 3D FREE has just hit the No. 1 top spot on Samsung Apps. You can a grab a copy of our No. 1 Christmas hit at Funky Cam 3D on the Samsung App Store

Funky Cam 3D is also available on the following platforms:

* iPhone and iPad

* Android (also available on most other Android stores)

You can find out more about Funky Cam 3D at http://www.funkycam3d.co.uk

If you are interested to know how many downloads that equates to per day then the value is 3000-4000 downloads per day. Just goes to show the marketing power of Samsung’s Bada platform.

IwGame Engine v0.24 Released – New Unified Ad Engine Support

Its taken a few weeks and loads of chasing people up and tests but we finally got our unified ad engine integrated into IwGame. And to celebrate that event we are releasing the code as open source. You can download the latest version of IwGame Engine from here

Here are the latest changes to IwGame:

  • Bug fix – Headers are now applied to CIwGameHttp GET requests
  • Added CIwGameHttpManager::DetermineUserAgent() to build a browser compatible user-agent
  • Added CIwGameHttpManager::DetermineIPAddress() to determine the users IP address. Please change PING_DOMAIN to your own domain!
  • Added CIwGameString::Replace(char chr, char with) char string replacment method
  • Added CIwGameString::Contains(char chr) to check if a string contains a particular char
  • Added CIwGameString::URLEncode(const char* str) to url encode an ascii string
  • Added CIwGameUtils::GetGraphicModeName(int width, int height) returns VGA style naming graphics mode
  • Added CIwGameAd – Main ad request class which requests and retrievs ads from a variety of ad providers (Inner-active and Adfonic are supported at the moment)
  • Added CIwGameAdView – Requests ads at set intervals and displays them using animations, can cache ads
  • Added CIwGameAdsViewAnimator, a basic example animator that can be used to animate ads in a CIwGameAdsView

As well as the ad request and ad view classes you will notice a few other neat additions that may prove useful such as DetermineIPAddress() and DetermineUserAgent(). DetermineUserAgent returns the IP of the device that your app is running on whilst builds a browser compatible user-agent string for all supported Marmalade platforms. Yes, I know the user-agent is fudged bit it seems to work well and its a lot more compatible with other web API’s than the default s3e user-agent header.

We decided to separate the ad request class CIwGameAds from the actual ad renderer CIwGameAdsView to enable developers to simply use one without the other, so if you just want the ability to put in an ad request feel free to just roll with CIwGameAds. if on the other hand you want the complete package that requests ads at a regular interval, displays them and handles clicks then go with CIwGameAdsView.

We have provided an example with the test bed this update that shows you how to initialise, update and shut down ads (see main.cpp). Lets take a quick look at the code that has been added:

Application ID

All ad networks need some way to identify you and your app as the originator of the ad and click requests, without them you wouldn’t get paid, so ensure that you sign up with any ad network that you are planning on usng and get your Application ID. Each ad p[rovider may call the application ID something different, such as site ID or vendor ID etc.. No matter what they call it, we call it the Application ID and it must be supplied to IW_GAME_ADS_VIEW->Init(Application_ID_String);. Note that the current example will show House Ads from inner-active even with no Application ID (this is just to show you it working).

Note that you can change your Application ID in-between requests as well as which provider you are using, this is a good way to ensure that you get a close to a 100% fill rate maximising your revenue; if one ad provider does not return an ad then request one from the next ad provider. We will add support to automate this at a later date.

Whats Changed in Our Code

Firstly we added the following headers:

#include “IwGameAdsView.h”
#include “IwGameAdsViewAnimator.h”

Then we added an initialisation function to initialise the ads system:

void AdTest_Init() { int width = IwGxGetScreenWidth(); int height = IwGxGetScreenHeight(); // Create ad view CIwGameAdsView::Create(); // Initialise with Application ID (you get this from your ad provider) IW_GAME_ADS_VIEW->Init(""); // Set ad provider IW_GAME_ADS_VIEW->setAdProvider(CIwGameAds::InnerActive); // Set ad request interval in seconds IW_GAME_ADS_VIEW->setNewAdInterval(30); // Force a request for an initial ad IW_GAME_ADS_VIEW->RequestNewAd(CIwGameAds::InnerActive); // Set total number of ads visible in the ads view IW_GAME_ADS_VIEW->setNumAdsVisible(1); // Tell animators to loop IW_GAME_ADS_VIEW->setLooped(true); // Create and attach an animator that fades the ad in over 1 second, pauses for 7 seconds and then fades the ad back out CIwGameAdsViewAnimator* anim = new CIwGameAdsViewAnimator(); anim->Init(); anim->setAdViewDataIndex(0); anim->setCanvasSize(width, height); anim->setInAnim(CIwGameAdsViewAnimator::AnimFadeIn, 1000); anim->setOutAnim(CIwGameAdsViewAnimator::AnimFadeOut, 1000); anim->setStayDuration(7000); IW_GAME_ADS_VIEW->addAnimator(0, anim); // Create and attach an animator that sweeps the ad in from the right the over 1,2 seconds, pauses for 7 seconds and then sweeps back out anim = new CIwGameAdsViewAnimator(); anim->Init(); anim->setAdViewDataIndex(0); anim->setCanvasSize(width, height); anim->setRestingPosition(0, -height / 8); anim->setInAnim(CIwGameAdsViewAnimator::AnimRightSweepIn, 1200); anim->setOutAnim(CIwGameAdsViewAnimator::AnimRightSweepOut, 1200); anim->setStayDuration(7000); IW_GAME_ADS_VIEW->addAnimator(0, anim); // Create and attach an animator that scales the ad in over 1.5 seconds, pauses for 7 seconds and then scales back out anim = new CIwGameAdsViewAnimator(); anim->Init(); anim->setAdViewDataIndex(0); anim->setCanvasSize(width, height); anim->setInAnim(CIwGameAdsViewAnimator::AnimScaleIn, 1500); anim->setOutAnim(CIwGameAdsViewAnimator::AnimScaleOut, 1500); anim->setStayDuration(7000); IW_GAME_ADS_VIEW->addAnimator(0, anim); // Create and attach an animator that rotates the ad in over 1 second, pauses for 7 seconds and then rotates back out anim = new CIwGameAdsViewAnimator(); anim->Init(); anim->setAdViewDataIndex(0); anim->setCanvasSize(width, height); anim->setInAnim(CIwGameAdsViewAnimator::AnimSpinIn, 1000); anim->setOutAnim(CIwGameAdsViewAnimator::AnimSpinOut, 1000); anim->setStayDuration(7000); IW_GAME_ADS_VIEW->addAnimator(0, anim); }

Don’t be alarmed and think OMG this is much harder than using AdMobs or iAds, most of this code is simply for setting up animations. In fact, yuo can just strip out the animation code (marked in orange) and remove it, the adw ill simply sit in the middle of the screen quite motionless.

Now lets take a look at how we update the ad system:

void AdTest_Update() { // Update the ads view IW_GAME_ADS_VIEW->Update(GAME->getCurrentScene(), 1.0f); // Draw the ads view IW_GAME_ADS_VIEW->Draw(GAME->getCurrentScene()); }

Nice and super simple. if you are wondering, the underlying rendering is taken care of by Iw2D.

And finally our Ad clean up code:

void AdTest_Release()
{
IW_GAME_ADS_VIEW->Release();
CIwGameAdsView::Destroy();
}

All nice and easy stuff. Now you can run ads across all Marmalade SDK platforms, depending on the Ad Providers support for those platforms. Thus far we have tested on iOS, Android, Blackberry Playbook and Bada and ads are delivered and clicks registered.

Hiding and Showing Ads

If you are using CIwGameAdsView to display  ads then you can call IW_GAME_ADS_VIEW->setVisible(ad_visibility) to change ad visibility. Note that, if you make the ads view invisible then it will stop requesting and updating ads.

Displaying Multiple Ads

CIwGameAdsView currently supports display of multiple cached ads simultaneously. To enable this feature simply call IW_GAME_ADS_VIEW->setNumAdsVisible(ad_count); This will tell ads view to draw the last ad_count ads that have not expired. You will need to set the screen positions, scales, rotations etc for each separate ad unit by calling setPosition(), setScale(), setAngle() etc methods of CIwGameAdsView. The first parameter is the index of the ad slot you want to change. You cam do this manually or attach animators.

Which Ad Providers Are Supported?

We’ve spent most of the last few weeks trying to integrate with ad providers network API’s, which is made more difficult than it should be because some providers are a bit lax and even unhelpful when it comes to providing integration support, some have been pretty good though, especially Inner-Active, they are very on-the-ball.

We went ahead and left all of the code in there for all providers that we have attempted to integrate this far in case any of you want to pick up on where we left off.

The current list of providers we have attempted integration with includes:

  • Inner-Active – Works incredibly well across all platforms
  • AdFonic – Works, now has full support for carrier and WiFi
  • MobFox – Ads wont deliver over WiFi or carrier, trying to fix
  • InMobi – Ads wont deliver over WiFi or carrier, trying to fix
  • Madvertise – Registering impressions but never returns any ads
  • Mojiva – Awaiting app approval before we can test, so potentially works

We plan to ad support for most of the other major Ad players, once we find details of the REST based API’s

What Information Do I Need to Supply?

You should provide at least the following minimum information to the CIwGameAds class before requesting ads:

  • Application ID

If you want more targeted ads then you can also supply other information such as:

  • Users Age
  • Users Gender
  • Users Location
  • Application Category
  • Users Mobile Number
  • Keywords associated with the user

Note that not all ad providers will use all of the above.

Marmalade SDK Tutorial – Apple iPhone and iPad Deployment and Submissions

This tutorial is part of the Marmalade SDK tutorials collection. To see the tutorials index click here

Its been a while since I posted any new Marmalade SDK tutorials because I have been so incredibly busy, I’ve also been focusing a lot of time lately on the soon to be released IwGameAds update to the IwGame engine (should be up on the blog today). Well, I’m now project free, nothing to work on for clients at the moment, so I have free time to blog.

Ok, lets move into the subject of the blog, debugging, deploying and app store store submissions for iOS devices (iPhone, iPod and iPad). I felt an urgent need to cover this subject as I have noticed many problems popping up on the Marmalade forums relating to iOS provisioning and app store submissions, so my insane desire to help out has got me caught up in an afternoons work of creating this useful guide.

iOS Development on Marmalade Introduction

The great thing about developing iOS apps with Marmalade is that by following a few simple rules your aop will run on any supported device as long as it runs on the Marmalade SDK x86 / Arm simulators. If you have come from a Cocoa / Objective-C background there are a few things to note when devloping with Marmalade SDK:

  • C/C++ is the primary language for development
  • You don’t have access to interface builder, instead Marmalade provides UI and font builder applications for creating complex user interfaces and fonts
  • Development can be done on both PC or Mac.
  • You can add code that has been developed using the iOS SDK / Objective-C via Marmalades extensions developer kit (EDK), but this code will not be cross platform compatible, so will only work for iOS deployments
  • Marmalade now supports native UI via IwNUI allowing you to create UI layouts that use native IOS controls (currently supported on iOS, Android, other platforms will fall back on Marmalade’s generic UI API IwUI)

For the duration of this article we are going to use a fictional app called “iScream Candy” that we are going to fictionally provision, develop and distribute.

iOS Provisioning Introduction

Well, I don’t accuse Apples account set up and provisioning process to be impossible but is has had me in tears before, fortunately in this article I am going to hopefully save many of you a bucket load of tears by providing a nice list of steps showing how to sort all this our quickly and quite painlessly,

What is provisioning and why is it needed by the way? In general terms. provisioning is the process of enabling development for a developer, allowing them to build and deploy apps to Apples devices and limiting access to those apps. This is needed to a) prevent software piracy and b) keeps control of who can develop apps on Apple devices.

The first thing you are going to need is an Apple Developer account. Go to http://developer.apple.com and create one.

Once you have your developer account, you need to click on “iOS Dev Center” to gain access to iOS developer resources. You will be asked to log in again. once logged in you will be presented with the iOS Dev Centre front page, you should note the “iOS Developer Program” menu down the right hand side of the screen

Here you will see 4 options, but we are only really interested in the first one for now “iOS Provisioning Portal”, click on it to go the provisioning portal.

Now take a look down the left hand side of the screen, you will see quite a few options. These options allow us to generate developer and distribution certificates, add devices that are allowed to run our apps, create app ID’s and provisioning profiles.

iOS Development Certificates

In order to develop and distribute products on the iOS platform Apple needs to know that our app is made by us and that our apps code is reliable and if something should go wrong Apple know where to go knocking. Security certificates allow developers to sign applications using their identity showing that they are “trusted” and not some malicious software developer that’s creating apps to destroy iOS devices or steal users personal details.

There are two kinds of certificates that you are going to need:

  • Development certificate – You need this to deploy your app to iPhone. iPad and iPod
  • Distribution certificate – You need this to deploy your app ro the Apple app store

Creating an iOS Development Certificate

In order to deploy our cool iOS apps to our iPhone, iPod or iPad we need to create a development certificate. This process starts with the Marmalade SDK. Here are the complete instructions:

1. Run the Marmalade iPhone Sign Request tool, this will launch Marmalades signing request tool which will create a developer key and a signing request for you
2. Click “Browse” and select a folder where you want Marmalade to save the signing request
3. Select “developer_identity.key” from the Key File drop down
4. Now enter your developer company name into the “Common Name” box
5. Enter the email address that you have assigned to your Apple developer account into the Email Address box
6. Finally hit the “Run” button

The tool will now generate a file called signing_request.csr in the folder that you selected in step 2. It will also generate a developer_identity.key key file in the \Marmalade\5.x\s3e\deploy\plugins\iphone\certificates folder (make a backup of this file)

Now over to the Apple side of things:

7. Go to the “iOS provisioning portal”
8. Click on the “Certificates” menu
9. Click on the “Development” tab
10. Click on the “Request Certificate” button
11. You will see a button at the bottom of the screen called “Choose File”. Click that button and select the signingrequest.csr file that you exported from Marmalades signing request tool
12. Click the “Submit” button. The certificate will be marked as “issued”. Click on the “Development” tab again to refresh the page (sometimes you need to refresh few times), this will add a button called “Download” to the right of the screen
13. Click on the “Download” button, this will download a file called “ios_development.cer”, save this file
14. Make a backup of this file and also copy and rename the file as \Marmalade\6.x\s3e\deploy\plugins\iphone\certificates\developer_identity.cer
15. Marmalade will now use the developer_identity.key and developer_identity.cer to sign your apps for deployment during development

Creating and Provisioning an iOS Application for Development

You probably already have test app or even a full app that you are waiting to test out on an iOS device, but before you do, there are a couple of changes you need to make.

The first thing you will need is an Application ID (App ID) which uniquely identified your app to the world. To create one we need to head back over to Apples iOS provisioning portal and carry out the following steps:

16. Click App ID’s option on the menu
17. Click “New App ID” button
18. Enter “iSCream Candy” as the app description
19. Enter “com.yourcompanyname.iscreamcandy” as the Bundle Identifier
20. Click the “Submit” button which takes you back to the App ID’s list

In order to deploy to an actual device we need to add our Apple device to the provisioning portal like this:

21. Click on the “Devices” menu
22. Click the “Add Devices” button
23. Enter a name for your device (anything you like)
24. Enter your devices Device ID. To get your devices ID carry out the following steps:

  • a. Plugin your device into the USB
  • b. Run the iPhone Configuration Utility
  • c. Select your devices in the left hand menu
  • d. In the summary tab you will see an “Identity” field, the long hexadecimal string is your Device ID
  • e. Keep the configuration tool open because you will need this in a moment to install your provisioning profile to the device

25. Click the “Submit” button

You will also need a developer provisioning profile, so head back to Apples provisioning portal and carry out the following steps:

26. Click on the “Provisioning” menu
27. Click “Development” tab
28. Click “New Profile” button
29. Enter “iscream_candy” as the Profile Name
30. Tick the box next to your certificate name to associate the certificate with this profile
31. Select “iScream Candy” as the App ID
32. Tick the checkbox next to your iOS device that is in the list of devices
33. Click “Submit” button
34. Click on the “Development” tab to refresh the screen
35. Click the “Download” button at the side of the “iscream_candy” profile name and save the file (will be called “iscream_candy.mobileprovision”)
36. Drag the provisioning profile file “iscream_candy.mobileprovision” onto the iPhone Configuration Utility
37. Select your iOS device in the left hand menu in the the oPhone Configuration Utility
38. Select the “Provisioning Profiles” tab
39. Locate “iscream_candy” and click the “Install” button that is shown next to it

Now we go back to the Marmalade side of things. We need to let the Marmalade deployment tool know a few things about your app before we deploy:

40. Open up your projects MKB file
41. Add a section like this:


deployments { [“iPhone”] name=’iScreamCandy’ caption=’iScream Candy’ manufacturer=’Company Name’ provider=’Company Name’ version-major=1 version-minor=0 iphone-appid=’com.companyname.iscreamcandy’ }

This deployment section will allow us to auto fill in the information that we provided when we use Marmalades deployment tool to deploy our app to our iOS device.

We are now ready to build and deploy our app to the iPhone, iPad, and iPod.

Building and Deploying our App to an iOS Device

Ok, now we have provisioning for development and we have a deployment section added to our MKB project file, lets get our app installed to the device for testing.

42. In Visual Studio / XCode change the build type to GCC (ARM) Release and hit go, the project will now build. Once built, Visual Studio will launch the Marmalade Deployment Tool.
43. Select “ARM GCC Release” as the Build Type then click the Next button
44. Select “iPhone” as the deployment configuration then click the Next button
45. Select “iOS” as the platform to deploy to then click the Next button
46. Click the “Deploy All” button
47. When the deployment tool is finished it will create two files in our iPhone release deployments folder (the deployments folder is located in our build folder build_iscreamcandy_vc10\deployments\iPhone\iphone\release

Its worth noting here that you should check the deployment log to ensure that all went well, to do this click the “Log” button

48. Drag the iscream_candy.ipa file from that folder onto iTunes
49. in iTunes select your phone on in the menu on the left of the screen
50. Click on the apps tab and tick the checkbox next to our iScream Candy app then click on the Sync button to install the app

All being well the app should now appear on the iOS device.

Word of caution, delete your existing app from the iOS device before redeploying. Unless you change the version number of your app in the MKB file, iTunes will not install the same version number of an app if it already exists on the device.

Creating an iOS Distribution Certificate

So now you have a finished product and you want to submit it to the Apple app store for approval. The first thing you are going to need is a distribution certificate

In order to deploy our cool iOS apps to the app store we need to create a distribution certificate. This process starts with the Marmalade SDK, here are the complete instructions:

51.. Run the Marmalade iPhone Sign Request tool, this will launch Marmalades signing request tool
52. Click “Browse” and select a folder where you want Marmalade to save the distribution signing request
53. Change the name to “distro_signing_request.csr”
54. Select “distribution_identity.key” from the Key File drop down
55. Now enter your developer company name into the “Common Name” box
56. Enter the email address that you have assigned to your Apple developer account into the Email Address box
57. Finally hit the “Run” button

The tool will now generate a file called distro_signing_request.csr in the folder that you selected in step 2. It will also generate a distribution_identity.key key file in the \Marmalade\5.x\s3e\deploy\plugins\iphone\certificates folder (make a backup of this file)

Now over to the Apple side of things:

58. Go to the “iOS provisioning portal”
59. Click on the “Certificates” menu
60. Click on the “Distribution” tab
61. Click on the “Request Certificate” button
62. You will see a button at the bottom of the screen called “Choose File”. Click that button and select the distro_signingrequest.csr file that you exported from Marmalades signing request tool
63. Click the “Submit” button. The certificate will be marked as “issued”. Click on the “Distribution” tab again to refresh the page (sometimes you need to refresh few times), this will add a button called “Download” to the right of the screen
64. Click on the “Download” button, this will download a file called “ios_distribution.cer”
65. Make a backup of this file and also copy the file as \Marmalade\6.x\s3e\deploy\plugins\iphone\certificates\distribution_identity.cer
66. Marmalade will now use the distribution_identity.key and distribution_identity.cer to sign your apps for distribution to the app store

Creating and Provisioning an iOS Application for Distribution

We need a fair few bits and bobs in order to create an app that is ready for distribution to customers that are foaming at the mouth ready to spend their hard earned dollars on your new masterpiece (I wish lol). The first thing we need is a distribution provisioning profile that we can include with the app during submission, here’s how to generate it:

67. Click on the “Provisioning” menu in the iOS Provisioning Portal
68. Click “Distribution” tab
69. Click “New Profile” button
70. Ensure that “App Store” is selected
71. Enter “distro_iscream_candy” as the Profile Name
72. Select “iScream Candy” as the App ID
73. Ensure that the “Distribution Certificate” says “Company Name (expiring on {Some date in the future})”
74. Click “Submit” button
75. Click on the “Distribution” tab to refresh the screen
76. Click the “Download” button at the side of the “distro_iscream_candy” profile name and save the file
77. Copy the saved distro_iscream_candy.mobileprovision file to the Data folder in your build

Now over to the Marmalade side

78. Open up your projects MKB file
79. Update your deployments section to look something like this

deployments
{
  ["iPhone"]
  name='iScreamCandy'
  caption=''iScream Candy'
  manufacturer='Company Name'
  provider='Company Name'
  version-major=1
  version-minor=0
  iphone-appid='com.companyname.iscreamcandy'
  iphone-splash="data/Default~iphone.png"
  iphone-icon="data/icons/iPhoneIcon.png"
  iphone-icon-ipad="data/icons/iPadIcon.png"
  iphone-icon-high-res="data/icons/iPhone4Icon.png"
  iphone-sign-for-distribution='1'
  iphone-provisioning-profile="data/distro_iscream_candy.mobileprovision"
}

You will notice a few other extra pieces of information have appeared in the MKB file. As we are getting ready to distribute our app we also need to provide icons and splash screens. If you app is a unified iOS app (compatible with iPhone and iPad) then you need to supply splash screens and icons for both platforms.

Getting ready for iOS App Store Submission

Before we can submit our super cool but hastily named game to Apple for approval we need to create app icons, splash screens, screen shots and text / keywords etc..

80. The iOS expects the following sized icons (see above MKB deployment section to see how to include them)

  • iphone-icon – Standard iPhone icon (57 x 57 pixels)
  • iphone-icon-ipad – Standard iPad icon (72 x 72 pixels)
  • iphone-icon-high-res – iPhone with retina display (114 x 114 pixels)

81. In addition, you need to supply 3 different splash screens that need to have specific names:

  • Default~iphone.png – Standard iPhone splash screen (320 x 480 or 480 x 320)
  • Default~ipad.png – Standard iPad splash screen (768 x 1024 or 1024 x 768)
  • Default@2x~iphone.png – iPhone with retina display (640 x 960 or 960 x 640)

To ensure that these files get included in your build you need to add them to the assets section of your MKB file like this:


assets { (data) “Default~iphone.png” Default@2x~iphone.png “Default~ipad.png” }

82. You also need the following additional graphical items:
* 512 x 512 iTunes Artwork Icon – This is a hi-resolution version of your app icon
* At least 3 iPhone screen shots (320 x 480 or 480 x 320)
* At least 3 iPad screen shots (768 x 1024 or 1024 x 320)

iOS App Store Submission

We are finally there, woohoo, I’m so glad because my fingers are starting to break!

83. To submit an app to Apple you need to log into iTunes Connect (menu option beneath Provisioning Portal) on the iOS dev web site
84. Click on “Manage Your Applications”
85. Click on the “Add New App” button to create a new application
86. Enter “iScream Candy” as the App Name
87. Enter SKU number (put anything you like or that’s relevant to how you track apps)
88. Select “com.companyname.iscreamcandy” as the Bundle ID
89. Click the “Continue“ button
90. Select availability date to some point in the future (choose 2-3 weeks from now, you can change this when the app is passed)
91. Select price tier (to find out what the tiers mean in dollars click the “View Pricing Matrix” link)
92. Click the “Continue“ button
93. Fill in the app information, add app icon and screen shots etc..
94. Click the “Save” button
95. Click on the View Details for your app
97. Click on the “Ready to Upload Binary” button at the top right of the screen
98. Select “No” when asked about export compliance (unless you are using encryption) then click the “Save” button

The next screen will tell you how to download and install XCode so you can gain access to Application Loader (a small app that lets you send you binary to apply for certification)

99. Click “Continue”
100. Locate and run “Application Loader” on the Mac (Minimum version Mac OS X 10.5).This should be located in /Developer/Applications/Utilities/Application Loader.app. if not then you will need to download and install either the latest version of XCode or iOS SDK 3.2
101. Click “Next” on the application loader welcome screen
102. Log in with your iTunes Connect log in details
103. When asked to “Choose Application” select the iScream Candy application from the drop down list and click “Next”
104. Check that the application metadata information is correct then click “Choose” to browse and select your applications binary zip file
105. Click the “Send” button to send the application binary to Apple
106. Once the application has finished uploading you will see a thank you screen, click the “Done” button to close it. If the application was not signed properly you will be notified here

Enabling Push notifications

For some odd reason Apple knocks all our apps back that are not push enabled (even though we do not use it), here’s the additional steps you will need to carry out to enable it.

107. Click “Configure” link next to the app ID for iScream Candy
108. Tick the “Enable for Apple Push Notification service” check box
109. At the side of the “Production Push SSL Certificate” click the “Configure” button
110. A window will pop up, click the “Continue” button
111. Click the “Choose File” button and select the signing_request_dtstro.csr file from earlier
112. Click the “Generate” button
113. Click “Continue” button then the “Done” button

And that’s it, you’re app is now in Apple heaven. It usually takes between 7 and 21 days to get approval, less if it is an update.

A few Additional Notes

  • I asked you to back up your certificates as you generate them earlier because when you install a new version of the Marmalade SDK you may lose them as you uninstall the previous version of the SDK. If you back them up you can simply copy them back into the \Marmalade\5.x\s3e\deploy\plugins\iphone\certificates folder
  • Provisioning profiles expire so you need to renew them now and again. Your IOS device will usually remind you when you need to renew a provisioning profile.

Well that’s its for this article. With any luck I have saved some of you much pain and suffering and hopefully a few buckets of tears

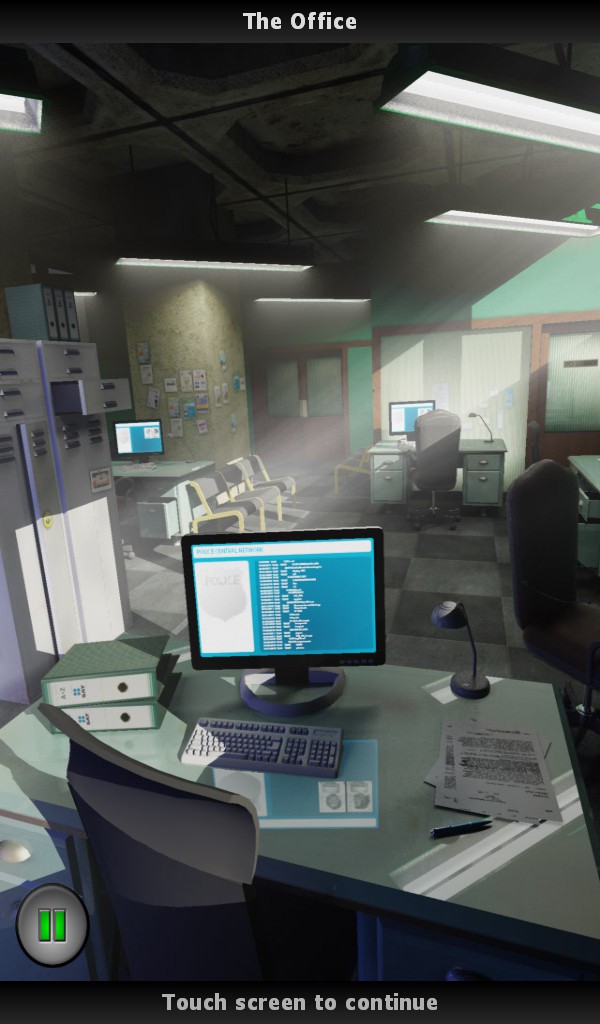
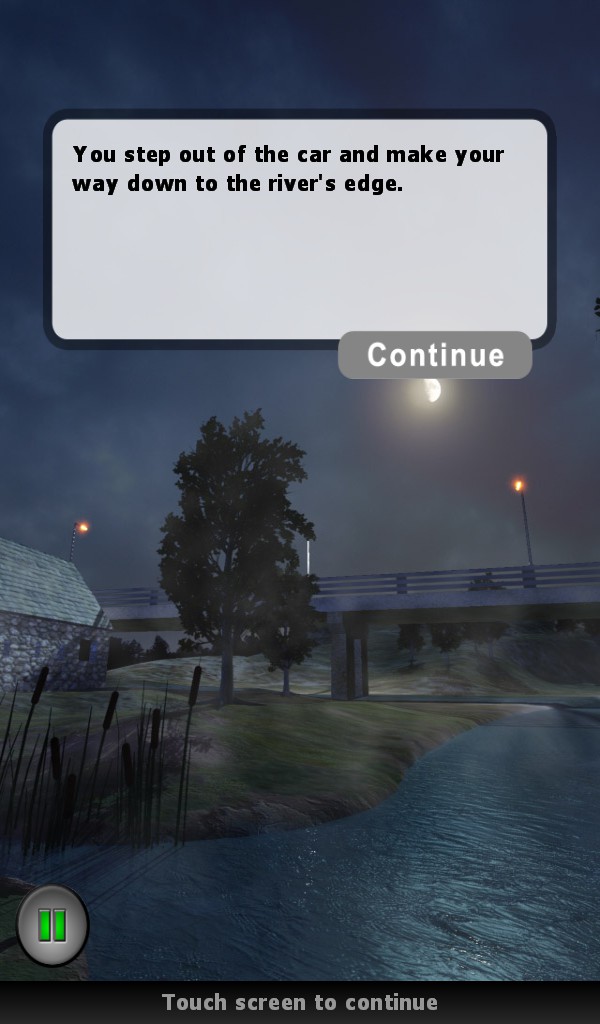
Murder Detective Hampton Bridge Murder Blackberry Playbook HD Game Out Now

Our client just released their Marmalade SDK powered HD adventure title “Murder Detective – Hampton Bridge Murder” on Blackberry Playbook, iOS and Android coming very soon.

https://appworld.blackberry.com/webstore/content/67338?lang=en

Games Description:

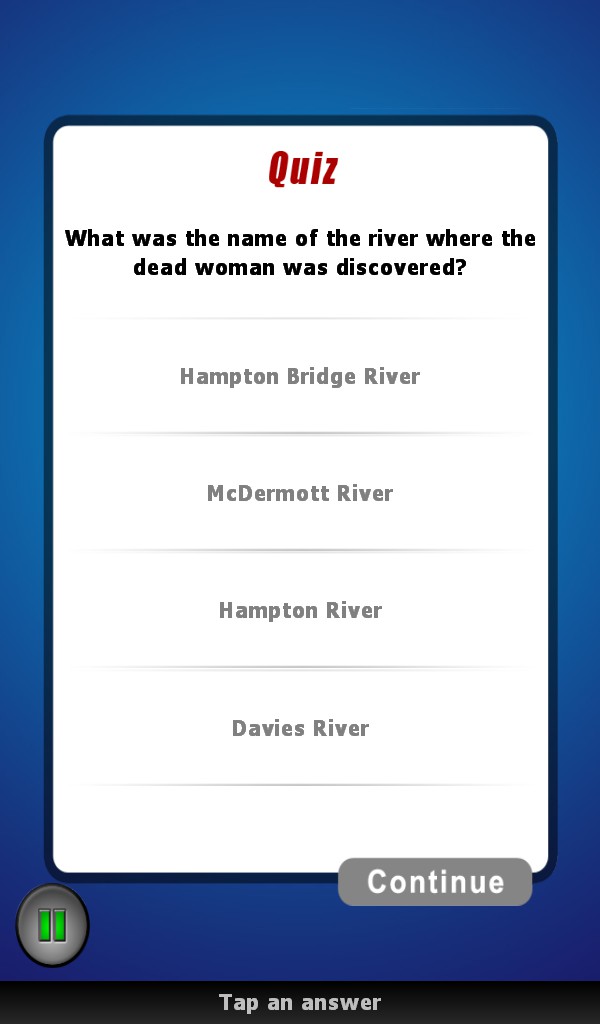
Murder Detective – The Hampton Bridge Murder. Join Detectives Phil McDermott and Dave Stanton as they try and solve the mystery of a woman found murdered on the banks of the Hampton River. Unravel the complex crime story and choose your path. Your choices will determine how the story ends. An interactive mystery where you control the adventure. Gather evidence, interrogate suspects, follow the clues and catch the murderer. You will be given a detective ranking at the completion of the case based on your attention to detail.

An Interactive Detective Mystery. Be Part of The Adventure. Play as Detective McDermott. Choose Your Path. Catch The Killer. Solve The Crime.

Screen Shots


Funky Cam 3D goes FREE!

Recently we looked at ways of monetising apps and games by charging nothing for them. Yes, I know it sounds ridiculous doesn’t it. Well, its not quite as ridiculous as it sounds. Its possible to make money from apps and games by either a) giving the game away for free and inserting ads in there (usually called ad-ware) and b) again, giving the game away for free but selling optional extras within the game (usually called freemium).

We recently implemented a platform agnostic API that uses the Marmalade SDK and Inner-actives M2M protocol to serve ads to all Marmalade SDK compatible phones and tablets. Currently supported platforms include iPhone, iPad, Android, Samsung Bada, Blackberry Playbook, Symbian, Windows Mobile, WebOS, PC and Mac.

The great thing about our ads is that they are different. Our ads don’t just sit at the top of the screen crying like babies for attention, instead they leap out at the user with animations and transitions, hypnotising the user into clicking on them. We like to see the process as bringing gaming to ads and not bringing ads to gaming.

We are opening up our API very soon for all Marmalade SDK developers. The ad engine will also become part of the IwGame engine with additional support for MobClix, AdWhirl and InMobi. Depending up on the API’s success we may also create bespoke versions for the iOS and Android SDK’s for those die hard developers that won’t convert to the Marmalade SDK. We will put a proper blog together  when the time comes.

Our animating ads work very well and our click rate (CTR) is proof that the pudding is cooked well. Here are a few figures:

  • Android – 3.23%
  • iPhone – 7.34%
  • iPad – 3.54%
  • Samsung Bada – 5%

Our average CTR with static AdMob ads is 1.76%

Ok, now onto the real subject, we have released Funky Cam 3D across iPhone, iPad, Android and Samsung Bada (Bada 2.0 coming soon).

Funky Cam 3D FREE can be downloaded from the following stores:

So please feel free to download Funky Cam 3D for free and check out what our animating ads look like.

Marmalade SDK 5.2 has Arrived

Well, I’m very pleased to announce that the eagerly awaited version 5.2 update to the Marmalade SDK is finally here. Some great new features have made it into the build including:

Native UI (IwNUI)

Native UI is a cross-platform UI framework that utilizes native controls. This allows developers to create user interfaces with native look and feel using a simple cross platform framework. Currently Marmalade supports Native UI on iOS and Android platforms, with IwUI used as a backend for all other platforms.

What does this mean for us cross platform phone and tablet developers? I can tell you, it means a great deal. This single addition to the SDK makes Marmalade a very viable application development platform for regular app style projects using the phones / tablets own native UI look and feel.

Bada 2 support

Support for Samsung’s bada platform is extended with this release; Marmalade can now target bada 2.0 devices.

We get a new platform, woohoo, the is the main reason why I love Marmalade so much!

iOS 5 EDK Support

iOS support has been extended to support building extensions with iOS 5.0 SDK. Extensions can now include features from iOS 5.0.

So we get access to new iOS 5.0 features via the EDK, which is great. iOS 5.0 has over 200 new features, such as the new notifications centre, iMessage, Reminders and iCloud,

Xcode Plugin Upgraded to Support Version 4.2

The Mac OS X SDK now supports Xcode 4.2 and the compiler and editor changes that were introduced with the iOS 5.0 SDK. Support for Xcode 3.x has been officially dropped. Please upgrade to the latest version. If required, Xcode 4 can be installed in parallel to any existing 3.x installation by specifying a different install location and using the xcode-select command line tool.

iOS Remote/Push Notification Support

Added full support for remote/push notifications in s3eIOSNotifications, including support for embedding provisioning profiles in development builds.

EDK Support on OS X

Extensions are now supported for Mac OS X deployments.

WebView Enhancements

s3eWebView now supports transparency and local file access.

Also included are many bug fixes and other minor enhancements and changes, too numerous to mention in fact. The full list is available in the re,lease notes on Marmalade’s web site

IwGame Engine Update – v0.230

Well its been an interesting day to say that its a Sunday, some good news and some bad new . The good news is that I managed to sneak some time in today to add a few updates to IwGame. The bad news is that some robbing (insert lots of non-religious type words here) has skimmed my card and robbed my bank account! (Can’t these people just get jobs like the rest of us!). Anyways, anger vented, now to get back on topic. We have just updated the IwGame game engine to v0.230. If you don’t know what IwGame is then in short it is a cross platform game engine for smart phones and tablets based upon the awesome Marmalade SDK. Here are the new features:

  • Added CIwGameImage::CreatePNG(int& size) to CIwGameImage to allow the creation of memory based PNG files
  • Added pngilb and zlib dependents
  • Added helper support to CIwGameInput for detecting touched, tapped events, delta change and back / menu buttons
  • Added CIwGameSprite::HitTest(int x, int y) which basically tests to see if a screen point is inside a sprite (takes into account scaling and rotation)
  • Added CIwGameAudio, CIwGameSound and CIwGameSoundCollection classed to support playback of sound effects and music
  • Added visual layers to sprites and actor system allowing sprites / actors to be depth layered
  • Added support for clipping in CIwGameScene. The scene can now be clipped to a rectangular area of virtual canvas

And here are the general changes / bug fixes:

  • Changed CIwGameFile::Open(const char* path, const char* mode, bool blocking), we now use mode instead of read / write flag
  • Added new CIwGameFile::Seek(int offset, s3eFileSeekOrigin origin) method
  • Replaced CIwGameHttpPostData::AddHeader() with CIwGameHttpPostData::SetHeader() to allow replacement of http headers
  • Added ClearRequests() and CancelRequests() to CIwGameHttpManager() allowing us to clear the request queue and cancel any in progress http requests
  • Removed two bugs from CIwGameInput, one that was stopping button / key presses and another that was preventing keyboard update if touch screen wasn’t present (doh!)
  • Added helper support to CIwGameInput for detecting touched, tapped events, delta change and back / menu buttons
  • Fixed CIwGameScene::removeActor(CIwGameActor* actor) bug (could not remove unnamed actors)
  • Fixed CwGameScene::removeActor(unsigned int name_hash) (would not deallocate pooled actors for re-use)
  • Fixed sprites initial state as invisible bug in CiwGameSprite
  • Moved Width and Height from CIwGameBitmapSprite to CIwGameprite, makes sense that all sprites would need to have a size
  • IwGame has been made into its own standalone project
  • The IwGame Testbed has now been moved to the TestBed folder

Important note, IwGame now exists as a separate project from the test bed. You now have to add IwGame to your project by adding IwGame to the subprojects section of your MKB file. The test bed is also a separate project and is located in the IwGame sub folder named TestBed. Lets take a quick look at some of the changes

Sprite Depth Layers

Its now possible to layer sprites in a sprite manager. The feature is automatic, all you have to do is set the layer of the sprite using setLayer(int layer_number). To set the number of depth layers available to the sprite manager you pass the layer count into the sprite managers Init() method. The default is set to 10 layers. As a scene contains a sprite manager to handle its contained visuals, you can also specify the number of depth layers when you initialise a scene: int Init(int max_collidables = 128, int max_layers = 10); Again, the default is 10 layers. Note that sprites on higher layers will be drawn on top of sprites on lower layers.

Creating PNG’s

You can now create an in-memory PNG file from a  CIwGameImage using CIwGameImage::CreatePNG(): uint8* png_data = image->CreatePNG(png_size); The method currently only supports images in RGB_565 and RGB_888 format. more formats will be added when I implement a new pixel conversion helper class.

CIwGameInput Expansion

I decided to pan CIwGameInput out a little adding new methods to do common tasks such as:

  • bool hasTapped() – Returns true if user tapped the screen
  • bool isTouching() – Returns true if user is currently touching the screen
  • CIwVec2 getTouchedPos() – Returns the position at which the user is touching the screen
  • CIwVec2 getDragDelta() – Returns the number of pixels the user has moved their finger / stylus since the last frame
  • bool isBackPressed() – Returns true if the back button was pressed (nice for Android)
  • bool isMenuPressed() – Returns true if the menu button was pressed (nice for Android)

These should help if you want to get up and running quickly with input.

CIwGameSprite hit testing

CIwGameSprite got a new method called hitTest() that lets you check to see if a point is inside a transformed sprite:

// Generate transformed vertices bool CIwGameSprite::HitTest(int x, int y) { // Generate transformed vertices int w = Width / 2; int h = Height / 2; TransformedV[0].x = -w; TransformedV[1].x = w; TransformedV[2].x = w; TransformedV[3].x = -w; TransformedV[0].y = -h; TransformedV[1].y = -h; TransformedV[2].y = h; TransformedV[3].y = h; for (int t = 0; t < 4; t++) TransformedV[t] = Transform.TransformVec(TransformedV[t]); int i1 = 0; int i2 = 3; for (int t = 0; t < 4; t++) { int x0 = TransformedV[i1].x - TransformedV[i2].x; int y0 = TransformedV[i1].y - TransformedV[i2].y; int x1 = x - TransformedV[i2].x; int y1 = y - TransformedV[i2].y; if ((x1 * y0 - x0 * y1) >= 0) return false; i2 = i1; i1++; } return true; }

This basically transforms the sprite by the sprites current transform and checks to see if a point falls inside the sprite (takes into account rotation and scaling). If you are curious about the method it uses dot products . If the points liles on the outside of any of the lines that make up the sprite then it cannot possibly be inside the polygon.

CIwGameAudio – Let there be Sound

Yes, that’s right IwGame just got audio. I basically built a wrapper on top of IwSound that lets you easily play sound effects located in a resource file as well as music. New classes include:

  • CIwGameAudio – This is the singleton that is responsible for creating, destroying and updating the audio system
  • CIwGameSound – This class represents an instantiates sound effect
  • CIwGameSoundCollection – This class represents a collection of sound effects

if you are using IwGame then you do not need to do anything except load a resource file that contains your sound effects and set the CIwGameAudio’s group like this:

CIwResGroup* AudioGroup = IwGetResManager()->LoadGroup("Audio.group"); IW_GAME_AUDIO->setGroup(AudioGroup);

You then play sound effects like this: IW_GAME_AUDIO->PlaySound(“explosion”); And music like this: IW_GAME_AUDIO->PlayMusic(“music.mp3”); Couldn’t get much simpler really However, if you want to set up and update the audio system yourself you will need to:

// Initialise audio system CIwGameAudio::Create(); IW_GAME_AUDIO->Init();

Then in your main loop, every frame call:

// Update audio IW_GAME_AUDIO->Update();

And finally on clean up call:

// Shut down audio IW_GAME_AUDIO->Release(); CIwGameAudio::Destroy();

CIwGameScene Scene Clipping

You can now set a rectangular area on a  per scene basis that all actors / sprites within that scene will be clipped to. Parts of sprites that fall outside the clipping region will not be drawn. To set up clipping simply call CIwGameScene::setClippingArea(int x, int y, int w, int h) where x and y are the top / left hand corner of the clipping area whilst w and h are the width and height. Note that clipping coordinates are not specified in pixels but in virtual canvas coordinates. The origin (0,0) is the centre of the screen. So if you virtual canvas is set to 480 x 320 pixels then use x = -240, y = -160, w = 480, h = 320 to clip to the full canvas, although you can just set w to 0 to disable clipping (that’s the default).

Well that’s it for this week, unfortunately I didn’t get the time to do a new Marmalade SDK tutorial but I will try and get that done mid next week. I have some free time coming up soon so I can knock lots of tutorials out. Also have some interesting news coming up soon about an SDK we just finished that pulls ads from inner-active and displays them all fancy 🙂 Compatible with all Marmalade deployment platforms.

Marmalade SDK Tutorial – Downloading and Using an Image from a Web Based Image File

This tutorial is part of the Marmalade SDK tutorials collection. To see the tutorials index click here

Unfortunately my brother rang me last night and asked me to have a few quick battles with him on World of Warcraft (I just can’t resist PvP) so as it happens, I forgot all about the time and missed publishing my next blog. In case you plaw Wow and you’re wondering I have Level 85 Mage, Warlock, Paladin and Druid!

In our previous tutorial we added the ability to send and receive data to and from a web server. We also created a new file class that deals with local and remote file access, allowing us to download files from the web and use them in our game. We also briefly mentioned that we had updated the CIwGameImage class to support JPEG’s and creation of images from memory based files. In this tutorial we are going to go into that a little more as well as show you how to use CIwGameFile and CIwGameImage to download and display images from the web inside your games and apps. If you just want the code to this tutorial then download it from here.

Imagine a situation whereby you can distribute your basic game without having to carry around any of its content, so no graphics, no audio, no level files etc. Whilst that may not be completely practical for some types of games it is for many others. Imagine your game running completely on dynamic content that lives on a server and you can modify it at any time, Your players will benefit greatly from new fresh content regularly. Well, this is all possible using the Marmalade SDK and IwGame (wow that sounded a bill salesy!)

IwGameImage Changes

Ok the first change we made was to add the ability to create a CIwGameImage image from a JPEG. This feature is unfortunately not supported by Marmalades image classes and missing out on JPEG compression for larger images is a bit of a pain. That said, Marmalade does provide access to LibJPG, allowing you to implement your own JPEG loader. However, seeing as we have already done the work for it, you may as well just rip the code straight out of IwGameImage.cpp.

The main method that takes care of JPEG decompression is CIwGameImage::DecompressJPEG(). Note that this method will create a RGB888 image from the JPEG file, I will add support for conversion to different image pixel formats in a future release.

The next change to CIwGameImage is the ability to create an image from a file that has already been loaded into memory. This is very useful if you want to cache the compressed versions of images in memory:

bool CIwGameImage::Init(const char* name, void* memory_file, int memory_file_size, bool is_jpeg)

name – The name you would like to assign to the file
memory_file – A pointer to the memory based file
memory_file_size – The size of the memory based file
is_jpeg – Determines if the memory based image file is a jpeg

Note that future versions will not rely on is_jpeg and instead, the header data will be checked to determine file type.

How to Create a CIwImage or CIw2DImage from a Memory Based File

Ok, lets take a look how we create an image from a memory based file in the CIwGameImage::Init() method:

bool CIwGameImage::Init(const char* name, void* memory_file, int memory_file_size, bool is_jpeg) { CIwGameFile file; if (file.Open(memory_file, memory_file_size)) { if (is_jpeg) { if (!DecompressJPEG((char*)memory_file, memory_file_size)) return false; } else { CIwImage image; image.ReadFile(file.getFileHandle()); Image2D = Iw2DCreateImage(image); Width = Image2D->GetWidth(); Height = Image2D->GetHeight(); } } State = CIwGameImage_State_Loaded; return true; }

As you can see we create a CIwImage by calling CIwImage::ReadFile() passing in the file handle of the memory based file (to find out how to create a file from a memory buffer take a look at CIwGameFile::Open(void* memory_buffer, int memory_buffer_len)).
To turn the CIwImage to a CIw2DImage we call Iw2DCreateImage() passing in the CIwImage.

How to Create a CIwImage or CIw2DImage from a Pixel Data

In our CIwGameImage::Init() method you will notice that if the image file is a jpeg then we call DecompressJPEG(). If you look towards the end of our DecompressJPEG() method you will notice that we create our CIwImage / CIw2DImage a slightly different way.

Because we are manually loading and decompressing the pixel data within the JPEG image we are left with a memory buffer containing our raw uncompressed images pixels. Marmalade’s usual create from file style image creation methods do not cover this, so instead we create the image ourselves from the pixel data like so:

CIwImage image; image.SetFormat(CIwImage::RGB_888); image.SetWidth(Width); image.SetHeight(Height); image.SetOwnedBuffers((uint8*)data, 0); Image2D = Iw2DCreateImage(image);

Basically we create a CIwImage, set its format and dimensions then tell it where our pixel data is using SetOwnedBuffers(). Like we did in the previous example, to turn the CIwImage into a CIw2DImage we call Iw2DCreateImage() passing in the CIwImage.

Creating an Image from a Web Based Image File

The new demo shows how to download an image file from the web and create an image from it then display that image as a sprite. Lets firstly take a look at how we download and create the image:

// Download an image file from the web CIwGameFile* image_file = new CIwGameFile(); image_file->Open("http://www.battleballz.com/bb_icon.gif", false, true); image_file->Close(); // Create an image from the downloaded gif file CIwGameImage* image = new CIwGameImage(); if (image_file->isFileAvailable() && image_file->getError() == CIwGameFile::ErrorNone) image->Init("", image_file->getContent(), image_file->getContentLength(), false); delete image_file; // We are done with the image file so we can delete it

Now we will create a sprite to display our downloaded web image::

// Create a test sprite to display our downloaded gif CIwGameBitmapSprite* test_sprite = new CIwGameBitmapSprite(); test_sprite->setImage(image); test_sprite->setDestSize(image->getWidth(), image->getHeight()); test_sprite->setSrcRect(0, 0, image->getWidth(), image->getHeight()); test_sprite->setPosition(image->getWidth() / 2, image->getHeight() / 2);

And that’s about all there is to it.

Some of you probably already have ideas buzzing around your heads on how to use this cool new system. I’m going to put some more time into the image class this week because I’m not happy about the way loading a jpeg and a web based image is different to the way we load images from a resource collection. I want to change the CIwGameImage class to basically allow you to specify not just a resource name, but also local file names and remote file names.

Well that’s it for this blog, as usual you can download the latest code from here

Happy coding and don’t eat too much tuna!

Marmalade SDK Tutorial – Sending and Retrieving Data From the Web

This tutorial is part of the Marmalade SDK tutorials collection. To see the tutorials index click here

In our previous tutorial we tidied up the IwGame engine and properly separated our engine calls away from our game code. We ended up with a nice system that allows us to begin building a game. This week we are going on a slight diversion because I have recently been working on sending and retrieving data from the web. I think that its important for any game engine to be able to pull in data from outside itself as it allows us to create games that are easily upgradable without having to put a new version of the game through the app store approval process. Its also cool to be able to send data to the web as it allows us to do cool stuff such as communicating with web services, accessing functionality that could add a lot of value to our games or apps. If you just want the code to this tutorial then you can download it from here.

I am actually going to do a couple of tutorials today that cover this subject, the first is covering the basics of interfacing with Marmalade’s IwHttp module that allows us to send GET and POST requests to a web server.

Oh, the reason for this diversion is because over the last few days I have been working to produce a cross platform ad API that allows Marmalade SDK developers to use Inner-active’s ads on any platform by writing a system that interfaces with Inner-active’s ad server and pulling back text and image based ads. Thus far I have the system returning and displaying ads. I just need to write the display system into its own view control and get the click system working. once that’s finished, it will become part of the IwGame game engine. I will blog about that when its finished. If you are interested in beta testing it then please get in touch.

IwHttp – Marmalade’s API for Performing HTTP Requests

IwHttp is the base module used by the Marmalade SDK that allows you to send and receive data from a web server over http and https. IwHttp allows you to perform both GET and POST operations. We have gone one step further however and simplified and extended its usefulness creating a new class called CIwGameHttpManager. If you would like to see how to use the IwHttp class in the manager then take a look at IwGameHttp.cpp and iwGameHttp.h.

CIwGameHttpManager – A Queued Http Request Manager

CIwGameHttpManager is a singleton class that allows you to throw GET and POST requests to it. The manager will queue the requests and them one by one until no requests are left in the queue. Note that the next request is only sent after the first returns. I’m not going to go into the internals of CIwGameHttpManager because the it and its associated classes constitute a lot of code. I will however explain how to use them.

Firstly you need to instantiate and initialise the CIwGameHttpManager singleton using:

// Initialise the http manager CIwGameHttpManager::Create(); IW_GAME_HTTP_MANAGER->Init();

And before you exit your game / app clean-up the manager using:

// Clean up http manager IW_GAME_HTTP_MANAGER->Release(); CIwGameHttpManager::Destroy();

In your main loop, you will also need to call the manager update so that it can do its stuff using:

// Update http manager IW_GAME_HTTP_MANAGER->Update();

Making a GET Request – Getting Data From a Server

To make a GET request we need to create a persistent instance of CIwGameHttpRequest and set it up, like this:

CIwGameHttpRequest* Request = new CIwGameHttpRequest(); Request->setGET(); Request->setURI(“http://www.battleballz.com/default.aspx”); Request->setContentAvailableCallback(&DataRetrievedCallback, (void*)this); IW_GAME_HTTP_MANAGER->AddRequest(Request);

Note that we have set a callback function that will be called when our data is available to use. Here is an example callback:

int32 DataRetrievedCallback(void* caller, void* data) { CIwGameHttpRequest* request = (CIwGameHttpRequest*)caller; if (request->getProcessed()) // Check to see if our request was processed by the http manager { // To get to our data we call request->getContent(); // To get to our data length we call request->getContentLength(); IW_GAME_HTTP_MANAGER->RemoveRequest(request); // Remove request from http manager queue } return 0; }

As you can see its ultra simple to retrieve data from the web.

Making a POST Request – Sending Data to a Server

To make a POST request we need to create a persistent instance of CIwGameHttpRequest and set it up, like this:

CIwGameHttpRequest* Request = new CIwGameHttpRequest();; Request->setPOST(); Request->setURI(“http://test.battleballz.com/Test.asmx ”); Request->setContentAvailableCallback(&DataRetrievedCallback, (void*)this);

Note that up to this point the setup is very similar except we specify setPOST() instead of setGET().

However we want to send some data to the server we have to, so we have to put it somewhere, this is done using the posts body llke this:

char length[32]; const char* body = "<?xml version=\"1.0\" encoding=\"utf-8\"?><soap12:Envelope xmlns:xsi=\"http://www.w3.org/2001/XMLSchema-instance\" xmlns:xsd=\"http://www.w3.org/2001/XMLSchema\" xmlns:soap12=\"http://www.w3.org/2003/05/soap-envelope\"><soap12:Body><HelloWorld xmlns=\"http://www.battleballz.com/test\" /></soap12:Body></soap12:Envelope>"; Request->AddHeader("Content-Type", "application/soap+xml; charset=utf-8"); sprintf(length, "%d", strlen(body)); Request->AddHeader("Content-Length", length); Request->setBody(body);

Then we add the request to the http manager

IW_GAME_HTTP_MANAGER->AddRequest(Request);

In the above example the body string holds an XML based SOAP request that we are sending to my test ASP.NET web service. In this case when the server gets this SOAP request it will call a method called HelloWorld which returns some data to us.

Note that when we send data to a web server we need to send some details about that data such as its type and length. In the above example we accomplish this by adding headers to our POST request.

When the POST has been made the web server will return a response which can be picked up in our callback function.

Ok, that all looks quite straight forward, but we can make things much simpler if we just want to download files from our web server, in steps the IwGameFile class

CIwGameFile – File Class That Handles Loading of Local and External files

Yes, we decided to put together a quick file class that handles loading of files from local storage and from an external web server. All you have to do is pass the URL and an optional callback (my kindness knows no bounds!)

Again, I don’t want to go into the intricate details about the implementation, instead I am opting for the telling you how to use it approach. IwGame is starting to become a small beast and I would rather spend the time improving it.

CIwGameFile is a basic general purpose file system class that allows you to open, create, read and write files. In addition it allows you to open a file located somewhere on the web using the http protocol.

Heres an example on how to open a local file, read some data and close the file:

CIwGameFile* file = new CIwGameFile(); file->Open("monkey_magic.txt”); file->Read(my_buffer, 1024); file->Close();

And here’s an example showing how to open a read the same file located on the web:

CIwGameFile* file = new CIwGameFile(); file->Open("http://www.battleballz.com/monkey_magic.txt”, false, true); file->Read(my_buffer, 1024); file->Close();

Note that the above method blocks the main loop and does essentially stops all processing of the game until the file is returned. I would instead recommend using a none blocking method like this:

CIwGameFile* file = new CIwGameFile(); file->Open("http://www.battleballz.com/monkey_magic.txt”); file->setFileAvailableCallback(FileLoadedCallback);

And our callback would look something like this:

int32 FileLoadedCallback(void* caller, void* data) { CIwGameFile* file = (CIwGameFile*)caller; file->Read(my_buffer, 1024); file->Close(); return 0; }

IwGameFile still requires a few upgrades to complete its functionality. Here are a few planned updates:

  • None blocking local file I/O
  • Timeout check needs adding to blocking http downloads
  • Add methods for reading / writing common types

Other additions to IwGame

You will notice that a few other bits and bobs have appeared in the game engine that i have not mentioned thus far. These include:

  • IwGameString – This is a basic string class that supports string builder type string building to cut down on memory allocations as well as stream type searching and some other utility stuff
  • IwGameImage – This class has been upgraded to support JPEG as well as creation of images from memory based files. Will cover this in more detail in my next blog

Well that’s it for this blog, as usual you can download the latest code from here

See you soon, with another (smaller thankfully) article.

Marmalade SDK Tutorial – Turning IwGame into a Real Game Engine

This tutorial is part of the Marmalade SDK tutorials collection. To see the tutorials index click here

In our previous tutorial we created created an actor, scene and camera system to automate the handling of game objects for us as well as allow us to create different types of actors derived from a common actor base. This week we are going to take the previous IwGame code base and turn it into a proper game engine. If you just want the code to this tutorial then download it from here.

Cleaning up the Mess

If you take a look at last weeks Main.cpp, you may agree that it just looks static, messy and not very readable. This week we are going to clean up our act and turn IwGame into a real usable game engine. Lets take a quick look at our new Main.cpp to see how much tidying up has been done:

int main() { // Init Game Game::Create(); GAME->Init(); // Main Game Loop while (!s3eDeviceCheckQuitRequest()) { // Update the game if (!GAME->Update()) break; // Check for back button quit if (IW_GAME_INPUT->isKeyDown(s3eKeyAbsBSK)) return false; // Draw the scene GAME->Draw(); } GAME->Release(); Game::Destroy(); return 0; }

Wow, ok, where’s everything gone? our game has been whittled down to initialisation, update, draw and clean-up. Well not quite, the code has gone somewhere, some of it has been integrated into the IwGame engine whilst the game specific code has been moved into a proper game class. Remember last week, we created scenes to manage actors? Well this week we have created a CIwGame class to manage scenes.

IwGame Class for Managing our Game

if you check out the engine code you will notice some new files:

IwGame.cpp
IwGame.h
IwGameImage.cpp
IwGameImage.h

Lets take a quick look at the CIwGame class:

class CIwGame { public: // Public access for scene iteration typedef CIwList::iterator _Iterator; _Iterator begin() { return Scenes.begin(); } _Iterator end() { return Scenes.end(); } protected: //// Properties CIwGameScene* CurrentScene; // Scene that has current input focus CIwGameScene* NextScene; // Scene that we wish to switch focus to CIwList<CIwGameScene*> Scenes; // A collection of game scenes public: void addScene(CIwGameScene *scene); void removeScene(CIwGameScene* scene); void removeScene(unsigned int name_hash); CIwGameScene* findScene(unsigned int name_hash); CIwGameScene* findScene(const char* name); CIwGameScene* getScene(int index); void clearScenes(); void changeScene(CIwGameScene *new_scene); bool changeScene(unsigned int name_hash); //// Properties end protected: uint64 LastFrameTime; // The time at which the last frame ended public: virtual void Init(); virtual void Release(); virtual bool Update(); virtual void Draw(); virtual void Save() {} virtual void Load() {} private: public: void SetBackgroundColour(uint8 r, uint8 g, uint8 b, uint8 a); };

As you can see its basically a class that allows us to add / remove and change scenes. It also provides initialisation, release, update, drawing and save / load functionality.

These methods represent the most basic functionality that I believe any game would need. If you take a look at IwGame.cpp you will notice that there is quite a lot of code in there. Lets take a quick look at what CIwGame::Init() does:

CIwGame’s Init() method carries out some basic Marmalade SDK and game specific initialisation:

void IwGame::Init() { CurrentScene = NULL; NextScene = NULL; // Initialise Marmalade SDK graphics system and Iw2D module IwGxInit(); Iw2DInit(); // Initialise the input system CIwGameInput::Create(); IW_GAME_INPUT->Init(); // Init IwSound IwSoundInit(); // Initialise Marmalade SDK resource manager IwResManagerInit(); #ifdef IW_BUILD_RESOURCES // Tell resource system how to convert WAV files IwGetResManager()->AddHandler(new CIwResHandlerWAV); #endif // Set default background colour SetBackgroundColour(0, 0, 0, 0); // Get initial time stamp LastFrameTime = s3eTimerGetMs(); }

You will notice that much of this code was present in our previous tutorials Main.cpp initialisation code. We have moved it into our CIwGame base so that we have some basic initialisation code that allows us to get our games up and running quickly.

Similarly our CIwGame::Release() method:

void IwGame::Release() { // Clean up scenes for (_Iterator it = Scenes.begin(); it != Scenes.end(); ++it) delete *it; Scenes.clear(); // Shut down the input system IW_GAME_INPUT->Release(); CIwGameInput::Destroy(); // Shut down the resource manager IwResManagerTerminate(); // Shutdown IwSound IwSoundTerminate(); // Shut down Marmalade graphics system and the Iw2D module Iw2DTerminate(); IwGxTerminate(); }

The only thing new here is the recursive release of all of the attached scenes

The last method I am going to look at is our CIwGame::Update() method

bool IwGame::Update() { // Calculate how long the last game frame took (capped at 60 and 10 fps) - We use this to scale all of our transient variables that rely // upon time so that everything movess at the same rate regardless of our devices frame rate float dt = (float)(s3eTimerGetMs() - LastFrameTime) / 16.67f; if (dt < 1.0) dt = 1.0f; if (dt > 6.0f) dt = 6.0f; LastFrameTime = s3eTimerGetMs(); // Clear the screen IwGxClear(IW_GX_COLOUR_BUFFER_F | IW_GX_DEPTH_BUFFER_F); // Update pointer system IW_GAME_INPUT->Update(); // Update Iw Sound Manager IwGetSoundManager()->Update(); // Check for scene change if (NextScene != CurrentScene) { // Notify scenes that there is a change of circumstances if (CurrentScene != NextScene) { if (CurrentScene != NULL) { CurrentScene->NotifyLostFocus(NextScene); if (CurrentScene->getAllowSuspend()) CurrentScene->NotifySuspending(NextScene); } if (NextScene != NULL) { NextScene->NotifyGainedFocus(CurrentScene); if (NextScene->getAllowSuspend()) NextScene->NotifyResuming(CurrentScene); } CurrentScene = NextScene; } } // Update all scenes that are not suspended for (_Iterator it = Scenes.begin(); it != Scenes.end(); ++it) { if (CurrentScene == *it) { (*it)->Update(dt); } else { if (!(*it)->getAllowSuspend()) { (*it)->Update(dt); } } } return true; }

Update() basically does most of what we were doing in our previous tutorials main loop, except that we use the concept of a “current scene”. Because scenes can potentially be overlaid over one another and we do not want to always be processing all scenes within our game, we use the concept of a current scene which has the focus of the player.

Now that we have the ability to change scenes, we ideally need a mechanism for notifying the other scenes that they have been switched to or switched away from, allowing our scenes to carry out processing specific to handle such events.

Another important addition to our game update loop is the measurement of time. At the start of Update() we calculate how much time has passed since Update() was last called. We can use this value to scale all of our transient variables (animations, movement etc..) within our game to ensure that they move in a consistent manner regardless of variations in frame rate. The variable dt holds our scaling factor, which is how much we need scale our transient variables by to ensure that they remain in step with our frame rate. If we did not handle time within our game then animations and movement / spinning etc.. would slow down when our games frame rate drops and increase when our frame rate increases.

Building Our Own Game Class

The idea of the CIwGame class is to provide the most basic functionality required to initialise, clean-up and update / draw our game. In order to create a real game we should derive our own class from CIwGame and add our own game specific code, not forgetting to call the CIwGame base methods so we do not miss out on our already implemented functionality.

In this case we create a class called Game.cpp which is a singleton class that derives from CIwGame and implements Init(), Release(), Update() and Draw() methods. if you take a quick look at Game.cpp you will notice that the game specific code from our old Main.cpp has been moved here.

We also go a step further and remove our dependency on storing references to scenes, images and animations etc, instead opting for finding them within their respective managers as and when needed. For example:

In Game::Update() we have:

CIwGameScene* scene = findScene("GameScene"); if (scene != NULL) { // Get tapped position in our virtual screen space CIwFVec2 pos = scene->ScreenToVirtual(IW_GAME_INPUT->getTouch(0)->x, IW_GAME_INPUT->getTouch(0)->y); // Find our sprite atlas CIwGameImage* image = scene->getImageManager()->findImage("sprites"); // Find our manic face animation frames CIwGameAnimImageFrame* anim = scene->getAnimFrameManager()->getImageFrames(0); // Create 10 player actors for (int t = 0; t < 10; t++) { ActorPlayer::Create(pos.x, pos.y, scene, image, anim); } }

Notice how we now search for our game scene, instead of accessing it via the local game_scene variable. We also do the same with image and anim.

This brings me to another new addition to the CIwGame engine.

CIwGameImage and CIwGameImageManager – Managing Images

After I had finished factoring out most of the code from Main.cpp I was left with what to do about the sprite atlas images that my game is going to use. I didn’t really want to be storing pointers to images all over the place that may or may not still exist, this can lead to some nasty and hard to find bugs. instead I opted to create a class that will manage all of the images that my scene allocates. This way we have them all in one central location and the manager can manage their lifetimes for us.

In addition, I thought that I would extend the CIw2DImage class a little by wrapping it up inside the CIwGameImage class, allowing us to add other cool functionality such as on-demand load and eventually streaming from an external web server (future blog will cover this).

So you will find that all instances of CIw2DImage throughout the engine have been replaced with the more manageable CIwGameImage class.
.
An important thing to note about CIwGameImage based images is that they rely on a CIwResGroup resource group, this is to allow them to be loaded on-demand.

To create and add an image to the game engine its a simple case of:

CIwResGroup* Level1Group = IwGetResManager()->GetGroupNamed("Level1"); game_scene->getImageManager()->addImage("sprites", Level1Group);

This creates our image based on its resource name and group and adds it to our scenes image manager. Note that the underlying CIw2DImage is not yet created. This gets created when you first call CIwGameImage::getImage2D() (on-demand). You can however force the loading / creation of the underlying CIw2DImage by passing true to addImage():

game_scene->getImageManager()->addImage(“sprites”, Level1Group, true); or by calling the Load() method on the CIwGameImage.

Well that brings us to the end of this tutorial, I’m very rushed this week so I will probably not get the time to create additional tutorials until next week. I did want to create an actual game this week using the engine, but I thought that with the engine tidy up is probably best to do that next week so readers don’t get lost. I may be able to fit a short blog update in early next week covering the wrapping up of Marmalades sample audio engine into IwGame.

If you want the source code that accompanies this tutorial then you can download it from here.